danrhiggins
Full Access Member
- Joined
- Jan 2, 2014
- Posts
- 1,126
- Reaction score
- 81
Great trip- and mini-trail reports, Dan! I would love to hear some bullet points on the tips that Tim gave you for mud/ruts and other pointers.
OK. Here goes. Most people already know all these - but they were new to me:
- First, a reminder that the center portion of our LR4s is 2 inches higher than the rated ground clearance. which is they they suggest taking rocks "down the middle".
- Tim encouraged me to freely use the Terrain Modes. And to understand how they work. The 4x4 screens in the display have information on what each terrain mode does. But it is even better to get a feel for each one.
- Turning off DSC can help in some Terrain Modes. DSC significantly reduces the responsiveness of the throttle. This became clear when I was becoming bogged down in the mud and needed to maintain my speed. I was in Mud/Ruts but still had DSC on and when I tried to accelerate to keep my speed up the throttle didn't respond as I needed it to. Tim quickly disabled DSC and the throttle control came back.
- As for mud, I had to learn to back of the throttle when heading into a turn while in muddy ruts. The truck wanted to push through the outsides of the soft, muddy ruts. Backing off the throttle let the weight of the vehicle surge forward a bit putting weight onto the front wheels while not applying torque. The wheels began to regain their turning and then I could gently reapply some throttle eventually gaining enough momentum to carry on through the mud. Sort of a feel thing but it really worked.
- Regarding the fact that the rear wheels track inside of the front wheel when turning, Tim suggesting using the B-pillar as the "pivot point". In other words, once the obstacle you want to turn around becomes visible in the 2nd row window (past the B-Pillar) you can begin your turn and the rear wheels will miss the obstacle.
- Approach shelfs and crossing cracks in the rock at an angle. Everyone probably knows this. But I had not realized how much better the approach angle is for the front wheels when you approach at an angle. Tim simply had me turn the wheels about 30-45 degrees then get out of the vehicle and look at the wheel. Duh!
- On that topic, he showed me how I can use the side view cameras to actually watch the front wheel - even to the point of being able to place the front wheel on a rock. Someone else on this forum had suggested using the cameras this way but it took doing it to see how it works.
- Tim uses low range a LOT. If under 30 and on any sort of up/down and/or rough terrain he uses 4L.
- Learning how to use the Cruise Control buttons to control Hill Descent Control speed. If you are in first gear it will start out at 1.8 MPH (I think) and you can adjust it up or down by 0.3 MPH increments using the Cruise Control up/down buttons. If you are in 2-4 gear then it starts out at 4 MPH.
- He reminded me to go slow, sometimes very slow, over obstacles. He called it "expedition mode" thinking. In other words, you need to protect your vehicle as if on an expedition where a vehicle breakdown can be a huge issue. Trust the vehicle's capabilities but don't beat it up when you don't need to.
There were a number of other things about the vehicle that I had not explored before such as using the Track and Route features of the Off-Road Nav to record where you have been and record a route. Using scroll mode to place the Nav system map where you want.
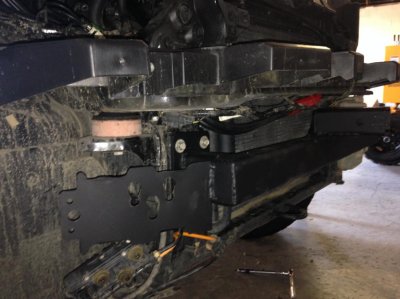
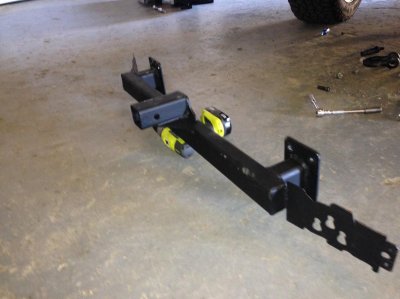
The winch solution sounds interesting not only for flexibility and utility in actual use, but also for mounting only as needed. The obvious question is strength but I'm guessing they thought that through!
I like the potential utility of this approach as well. I can easily see times when I would want a winch on the rear.
Had been looking forward to your report especially after seeing the article about LR closing down the course because it was "too muddy". Must've been a real slopfest.
It was definitely too muddy. Very bad. The first morning was a disaster because everyone was simply getting stuck, needing to be winched out, which made it impossible for everyone to get through. It did not get any better. The course was open to other vehicles so that was part of the problem.