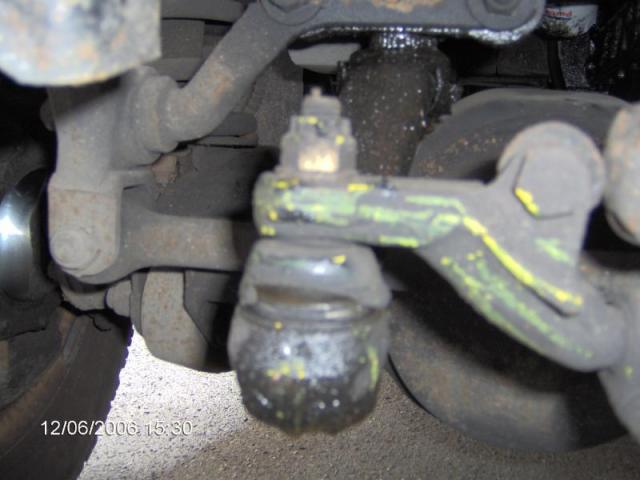
This is usually a real swine of a job. 95% of the time it goes wrong or gets unbelieveably difficult, and there's nothing much you can do about it except suffer! Failure of the ball joint is usually because the rubber gaiter on it gets split - allowing water in and the grease out - resulting in the ball seat corroding and causing excessive play. If the ball joint has been worn for some considerable time, you might be wise to just replace the whole arm, rather than mess around - sometimes the corrosion extends into the seating in the arm, and a repair isn't possible. Fortunately, this job went as planned, and it was quite easy - however this is a first, and I have had to use gas welding equipment to remove the inner ball seat in the past.
Anyway: this is the problem, fitted to 2.5 N/A and TD 90/110's - the joint is available as a kit, rather than later ones, which are a ready-made track rod end (TRE).
Remove the split pin, 19mm castellated nut and washer. Then strike the steering damper/steering link rod bracket here. The joint should pop apart.
Bend back the large tab washer and then undo the large nut that holds the drop arm to the steering box shaft.
Now the hard bit - the drop arm has to come off the shaft, and usually a big puller is needed to do this. There are two lugs on the drop arm, and I have a long chrome vanadium bar with a tapered end on it. From inside the engine bay the rod reaches down to the top of the drop arm on the lugs, and then I belt it ******* alternate sides until the arm lets go. There's no other way to remove the arm apart from these two methods, using heat will damage the steering box seals, but if you are going to replace the whole arm then you can cut best of the way through it and then crack it with a chisel.
Anyway - after about 10 minutes, the arm comes loose. With the rubber boot removed, the corrosion can easily be seen.
Remove the circlip and the guts of the joint will come out with the exception of the top ball seat.
Carefully clean the arm inside and out - use a small wire brush in an electric drill to remove rust and other dirt. Make sure that the circlip slot is cleaned as well - if the circlip isn't in properly, the joint will fall aprt after a short while.
Place the new seat in (make sure it's the right way round). Use a 19mm socket to press it in the housing nice and square.
Check that the seat is all the way in.
Dunk the ball end in grease and put it in next.
Then the bottom seat - grease will toothpaste out as you push it home.
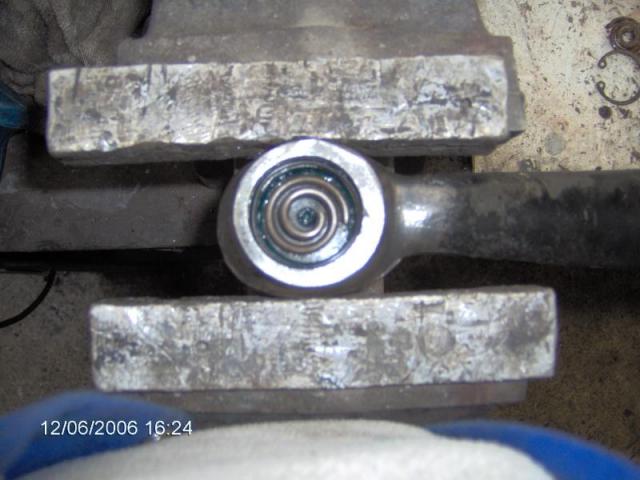
Now put the drop arm in a vice as shown, place the spring in the centre, and the thin rubber O-ring around the inside lip - this acts as a seal when the disc and circlip are fitted.
Place the disc on top of the spring - chamfered edge on the inside. Press it down against the spring with a rod or 3/8" extension bar, and then fit the new circlip, making sure it's in the slot all the way round. (this is quite a fiddly job, as the spring is quite powerful, and keeping the disc level at the same time is hard.
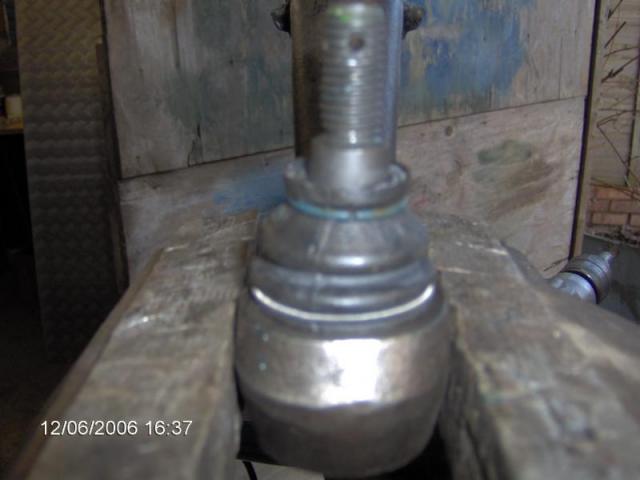
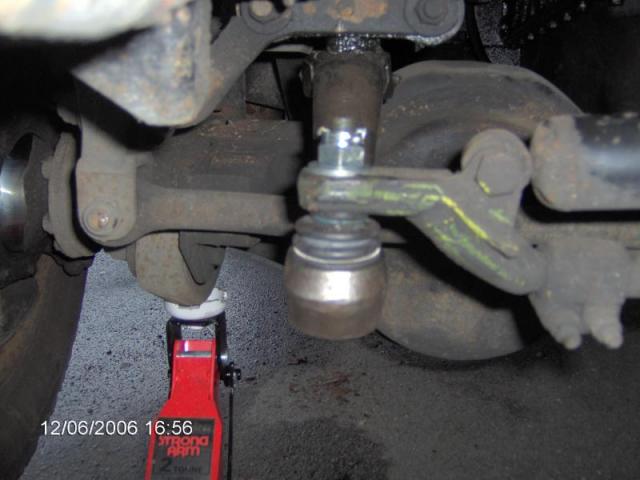
Turn the arm over, add more grease, place the rubber boot on, the spring retainer on the bottom, and the small steel clip ring on the top. The arm can now be fitted back on the vehicle.
Like I said at the beginning - this can be very difficult to do, and sometimes there's no way the arm will come off. It's not unusual to have to fit the repair kit with the arm still on the vehicle, and this just makes it all the more difficult.