How to: Supercharger Removal, Rear Crossover, and Passenger Valve Cover

Disclaimer: Links on this page pointing to Amazon, eBay and other sites may include affiliate code. If you click them and make a purchase, we may earn a small commission.

cashgtr313

Member
Joined
Jun 18, 2023
Posts
5
Reaction score
1
Location
Michigan
THANK YOU!! Dealer wanted me to pay $240 for the complete hoses assembly.smh

My supercharger hasn’t given me any issues or what are symptoms of a bad supercharger? I did change the oil , I used GM supercharger oil two bottles 8oz.
 

txfromwi

Full Access Member
Joined
Dec 18, 2013
Posts
504
Reaction score
254
Location
2013 & 2015 Houston TX. 2016 Rochester NY
The coupling is likely wearing and would need to be replaced.
On that video, go to 1:01:00 and watch the next little bit for the diagnostic.
The supercharger section is at 1:43:20

My supercharger contains 90mL, that's about 3 oz.

You used 16oz of oil in the supercharger???
We all know that every one of our vehicles is different because they are each individually built with whatever is laying around on the shop floor that day, but ain't no way that these superchargers use 16oz. And I would strictly never use any non-manufacturer approved fluid.
 

txfromwi

Full Access Member
Joined
Dec 18, 2013
Posts
504
Reaction score
254
Location
2013 & 2015 Houston TX. 2016 Rochester NY
As I discuss in the video, blah, blah, don't mean to lecture - really...
And not to start a knock down drag out kerfuffle...

The folks at Superchargers on Line are absolutely great at helping you to determine the correct fill amount for your unit.
Per my discussions with them, after providing them with all the casing stamp numbers and all the sticker numbers their exact words to me were
"OH! You have one of THOSE!"
Apparently there appear to be different fill amounts depending on your exact hardware.

The most common number I have seen is 151mL (5.1 oz), the comment above is for 112mL (3.8oz), and mine takes 90mL (3.0oz).

I took the approach of:
1. Is it factory original - YES
2. Is mine leaking? - NO, so whatever is in there is probably OK.
3. How much can I get out - 84mL
4. How much to put back - 85mL in the graduate cylinder, to allow 1mL residue and actually deliver 84mL
5. Cross fingers
6. So far so good after 1 year
 

cashgtr313

Member
Joined
Jun 18, 2023
Posts
5
Reaction score
1
Location
Michigan
Aww dam! I put in two bottles of 4oz!! SMH I’ll extract it. Something told me to check back in because I started the assembly process and it was going too smooth. DAM! 8oz is too much!
 

grgeorge81

New Member
Joined
Apr 9, 2024
Posts
4
Reaction score
3
Location
Michigan
I am in the middle of performing this service on my 2015 LR4 SCV6 to replace a leaky rear crossover pipe (heater manifold pipe). An indy shop replaced the front pipes, hoses, water pump and thermostat, but regretably did not service the rear pipe. I would recommend anyone removing manifold/Supercharger to do cooling system repairs/maintenance to replace front + rear simultaneously as 90% of the labor is removing everything on top. I wish I had been more educated on this particular engine and the likelihood of failure of these plastic components when I took it to the shop - they were representing themselves as LR "experts", in which case they should've recommended replacing 1 more $100 part while performing close to $3k worth of service on the front components - but you live and learn.

Thanks to txfromwi for the detailed video describing this process - an invaluable resource while performing this work. I have a few points to add from my experiences:

1. The electrical connector at the back of the driver's side cylinder bank is a real bugger for sure. I didn't spend 4-5hrs luckily. Was able to get a good view using cell phone camera and pick tools to pry the clip, but was almost certain I was going to break it and have to order a new one/splice together. Luckily it just popped off and the plastic somehow remained intact - but I attribute this to luck more than skill or patience. It's a ***** - just get it off and plan on possibly replacing.

2. The coolant hose that is clipped to the bottom of the Supercharger and connects to the rear crossover pipe is the other item that could easily get overlooked before attempting to remove the SC. The best method IMO would be to disconnect the small hose clamp at the top of the crossover pipe/manifold before removing the SC. If you connect that hose from the front, you will still have to disconnect those clips at the bottom before pulling out the SC, which is a bit difficult to do while holding the weight of the SC. Plus those clips will definitely break. If you remove the hose from the rear crossover first, it will come out as a unit and you won't have to mess with the clips on the bottom of the SC.

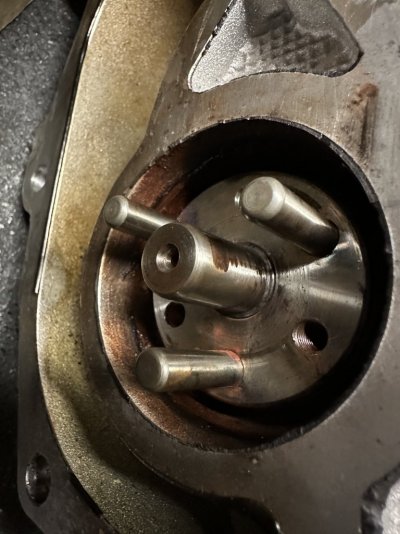
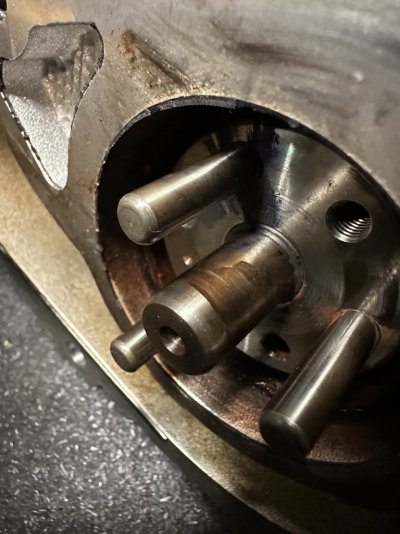
3. I took the advice of replacing the supercharger coupler while I'm in here. My snout was an extreme PITA to get off the SC body. I used some penetrating oil around the guide pins and entire mating surface which helped greatly, and there is a good pry point on top of the snout, directly to the right of the pry point that txfromwi used, that has a larger flat surface, and a protrusion in the body casting that helps get extra leverage if using a screwdriver-style pry bar that doesn't have a 90 degree angle on the head like the one in the video.

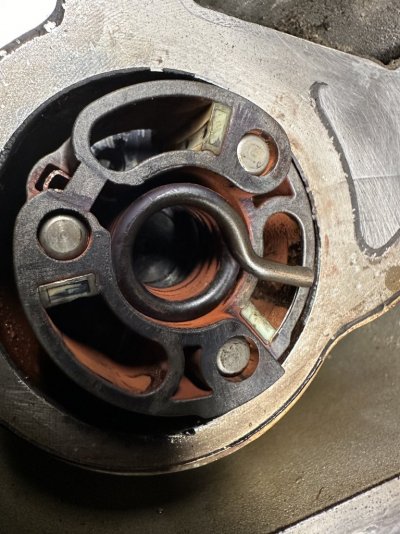
4. My SC coupler was fully intact - no broken plastic - but regardless the shaft was badly scored where the torsion spring "pinches" down on it. The shaft can only rotate so much within the spring, but enough to score it badly over time. I am changing to the nylon oil-filled version, so hopefully the scoring will not be an issue down the road. I guess if the balance is off enough, it could cause excessive vibration to the SC bearings - I'm hoping mine isn't so out of balance that this becomes an issue. I was also unable to locate the Genuine coupler directly from superchargersonline as suggested in the video - I found it here on ebay sold by "Quality Superchargers". The part has a "SCOL" (superchargers online) logo on it, so I am assuming they are one in the same - just noting for anyone looking for it directly on the SCOL website. https://www.ebay.com/itm/125379092325 Attached are some photos of my coupler and scoring on the shaft.

Thanks again and good luck to all!
 

Attachments

  • IMG_1692.jpeg
    IMG_1692.jpeg
    190.9 KB · Views: 7
  • IMG_1693.jpeg
    IMG_1693.jpeg
    136.5 KB · Views: 7
  • IMG_1690.jpeg
    IMG_1690.jpeg
    132.1 KB · Views: 6
  • IMG_1694.jpeg
    IMG_1694.jpeg
    100.8 KB · Views: 7

LB Bill

Full Access Member
Joined
Jul 24, 2019
Posts
197
Reaction score
88
Location
California
Excellent cautionary advice in your first paragraph. Would also like to know the miles on your truck now?...and the mileage when you had the front cooling parts done; what had actually failed then, and approximately how much the indy shop charged for that work??
A 2016 here with 23K miles on it. Thanks!!
 

grgeorge81

New Member
Joined
Apr 9, 2024
Posts
4
Reaction score
3
Location
Michigan
Excellent cautionary advice in your first paragraph. Would also like to know the miles on your truck now?...and the mileage when you had the front cooling parts done; what had actually failed then, and approximately how much the indy shop charged for that work??
A 2016 here with 23K miles on it. Thanks!!
I'm at 140,000 miles now - the front service was done around 110,000. The front crossover pipe was the main culprit, but they replaced the water pump, thermostat, and most of the hoses on the front. Came to around 3 grand altogether with close to half of that being labor involved in removing SC and manifold.

Wow, only 23k is awesome! Thats a year's worth for us - drive this thing a lot but love it.
 

Latest posts

Members online

Forum statistics

Threads
36,261
Posts
218,019
Members
30,496
Latest member
washburn72
Top