installing backup camera from garmin

Disclaimer: Links on this page pointing to Amazon, eBay and other sites may include affiliate code. If you click them and make a purchase, we may earn a small commission.

bbyer

Full Access Member
Joined
Aug 15, 2008
Posts
895
Reaction score
151
Location
Alberta
DIP switch settings

I used what I would call the old style GVIF unit which I located under the left side seat beside the Land Rover Nav computer/dvd device. That one in the eBay link is what I would call new style but probably does the same thing as the older larger silver coloured metal box.

For the DIP switches, the settings are as follows for the factory NAV computer and factory NAV display with aftermarket camera.

1 ON; 2 ON; 3 ON; 4 ON; 5 OFF; 6 OFF; 7 ON; 8 OFF Again these were for what I call the old style but seemed to be correct for all units out there for Land Rover LR3 / D3.


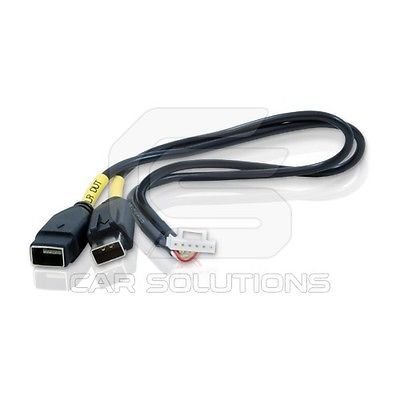
I did have some difficulty with the HLCDCA0001 cable; that is that three ended cable I spoke of.

The cable end that connects into the factory NAV computer, LR IN, seems to fit OK into the socket in the rear of the NAV computer but I felt had difficulty making a tight electrical connection.

It took me many attempts to get the NAV to display correctly. Initially, while the reverse picture would show, the NAV map picture would not.

Instead I received a message saying No Nav Signal Available. It took me until the day after I did the install to get the plug to send signal; a day later when I sorted some of the wires at the GVIF to make the installation better looking, the Nav signal/map disappeared. After I repeated plugging and unplugging of the LR IN end, and eventually all was well again. As such, I think the signal connection inside the connector is not the best and perhaps should be tighter right at the contacts.

That is about it for "secrets". Also I took power for the GVIF from the same circuit parts of the infotainment system are hooked up to, F58P in the fusebox behind the passenger side glove box. F57P would probably be OK as well. You want a circuit that eventually goes off but follows the NAV display/multi-media module power, and I think that is F58P.

Power to the infotainment system tends to be controlled by the opening and closing of doors and the door locks rather than say the radio on off volume knob or ignition key.

As far as sound is concerned, I am not certain what you are referring to as I only used the GVIF for the backup camera and it did not have any mic/sound associated with it.
 

bbyer

Full Access Member
Joined
Aug 15, 2008
Posts
895
Reaction score
151
Location
Alberta
GVIF for camera?

The GVIF that I installed looked like per the link below except that the one I purchased said it was for the LR3 / D3; the unit per the link below is for the D4.

The unit you provided the eBay link for, I am not clear what it does but I do not think it has anything to do with cameras regardless of where they are located.

http://www.ebay.com/itm/Car-Video-I...956?pt=LH_DefaultDomain_0&hash=item3a9ca36864
 

bbyer

Full Access Member
Joined
Aug 15, 2008
Posts
895
Reaction score
151
Location
Alberta

Attachments

  • Touch Screen GVIF cable.jpg
    Touch Screen GVIF cable.jpg
    12.3 KB · Views: 26

Tictaktoe

Well-Known Member
Joined
Apr 12, 2015
Posts
72
Reaction score
3
Hi experts,

A newbie here. I am planning to add a back up camera on my 2008 LR3 and came across this post http://www.rangerovers.net/forum/9-...-range-rover-sport-sc-05-09-a.html#post921394 that describes in quite detail about how to make it work with the existing OEM nav unit. I am planning to install it myself to save some $$$ (unless it gets really complex!)

It seems that the same parts should work with the LR3 as well.

1. I am just wondering where can I find the reverse light wire (the green/brown wire) on LR3 ?

2. Also, any advice/recommendations on what backup camera to get? I want someone that has the lines in it and also doesnt get foggy, etc.

3. Finally, if you have already installed a camera, from where did you get the wiring inside the trunk and what is the best location to put it? I am strongly contemplating getting the one that can be attached to the license plate as I do not want to drill any holes.

PS: Right now I have installed a dash cam DVR (just next to the rear view mirror), but would really love to have that integrated to the nav screen through gvif. Has anyone tried that?

Thanks so much in advance.
 

bbyer

Full Access Member
Joined
Aug 15, 2008
Posts
895
Reaction score
151
Location
Alberta
a few links of interest

Re the backup light power source, probe the trailer hitch wiring connectors that are located in the left rear C pillar area behind that little access door. One of the plug pins will show as hot when reverse is selected. Tapping in there is better than tapping in outside at the backup light itself.

The following are links of value. If you do the licence plate thing, you will have to drill a hole or squeeze a coax cable. I suggest you mount the camera so it looks stock. Go find an LR4 on a dealer lot and measure the location of the camera and do the same. It will be easier than the licence plate thing and look stock.


http://www.**************/forum/post604075.html#604075

http://www.aulro.com/afvb/d3-d4-rrs/126787-reversing-camera-3.html


This one below is what I purchased – Sony CCD NTSC 170 degree

Small thread unit 170 degrees

http://www.ebay.com/itm/Sony-CCD-3-...eo&vxp=mtr&hash=item19e097a602#ht_5983wt_1354


Link to my gallery with some good pdf's regarding the infotainment system.

When you get all this working, you will know a lot more than you do now about a lot of things - fibre optics, Canbus and Land Rover as well - the hard one to figure out. Have fun.

http://www.**************/gallery/thumbnails.php?album=34462


The stars are a result of this forum blocking the good stuff. Just go to the Disco3 forum and then do a search.
 

Tictaktoe

Well-Known Member
Joined
Apr 12, 2015
Posts
72
Reaction score
3
thnx bbyer. There's ton of information in those links and your gallery! Yet to find the information on infotainment given the no. of documents, but will try again tomorrow.

Also, the camera that you have, does it come with parking lines, and how does it work since you have been using it for some time (fogging, etc)? And did you need to drill any holes along the license light to insert the camera? I am assuming that given its mounted off center it would need either a much wider angle camera or would need to be adjusted slight,!?


Also, would love to get some feedback from you and other experts about does it make sense to install the camera at inside the vehicle at the back window (say towards the top)? This would avoid moving any wiring arrangement to inside.


Thanks!
 

bbyer

Full Access Member
Joined
Aug 15, 2008
Posts
895
Reaction score
151
Location
Alberta
no hoizontal parking lines

For parking lines, if you mean the kind the swivel with the steering wheel, no. There are lines that suggest where to stop however. The swivel kind of line would require that the visual system tie to the Canbus so that the image would know where the front wheels were pointed.

I would say that the 4x4 display shows front wheel position but on my setup, there is no connection between that and the image displayed.

As far as aiming, you get one chance so to speak when mounting the camera in the handle assembly above the license plate. That is why I closely followed the LR4 setup. For me, it works OK. The only drilling required was for mounting the camera - all wires used existing holes or flex rubber tubes. Lubricate the rubber tubes with WD-40 to make pushing conductors thru easier. To drill the camera mount hole, one has to remove the handle from the upper hatch - fairly easy the second time you do it, but the first, well there is a learning curve.

Also note that a backup camera, or at least what I have is not one of those windscreen Go Pro things - the field of vision is very limited relatively speaking - it is a backup camera for parking etc.

As to fogging, if that means does the lens get dirty due to road spray yes, but to date, there has been no internal condensation etc, and yes, one has to constantly clean the lens when on wet roads.

If you are looking for a Go Pro type picture, then yes, mount one in the rear window such that it can see thru the portion of the glass that the rear wiper cleans.

There is very little information available in the public domain regarding the infotainment system. It, along with the fibre optics is a bit of a black art yet.
 

Tictaktoe

Well-Known Member
Joined
Apr 12, 2015
Posts
72
Reaction score
3
Thanks and appreciate your patience on answering my questions. Just decided to change the tires first, they are almost towards the end of their life, so that means I'll have to hold on any expenses on gvif and rear cam. Have favorited those links though as I m sure, I'll need those whenever I get on my DIY projects.
 

bbyer

Full Access Member
Joined
Aug 15, 2008
Posts
895
Reaction score
151
Location
Alberta
update appreciated

I appreciate the update. One sometime wonders with regards often to silence.

I note that you have a model year 2008 LR3.

For what it is worth, I regard those of the best of the bunch. By 2008 Land Rover had finally incorporated a few necessary fixes but had not yet started to experiment by putting proposed LR4 systems in the 3's to see how they worked out.

I felt it was good that the world went into an economic slump in late 2008 as there were not many 2009 3's produced or purchased. To some degree, they tended to be experimental LR4's with LR3 headlights.

In other words, it is worth spending some money on tyres and the like to keep your HSE on the road - the electronic stuff gets only better and cheaper with time so it can wait.
 

Tuglife

Active Member
Joined
Jan 12, 2015
Posts
31
Reaction score
2
So, i got the Garmin GPS which comes with wireless backup camera.

this weekend we installed the camera itself, but didn't mount the GPS in the dash yet. (The gps unit is a tiny bit bigger then the opening in the center dash, so we'll need to come up with a better way to mount it one of these days)

since the camera is wireless and needs only 12v to start sending the signal, i decided not to connect it to the rear lights (when reverse is on) but instead hooked it up to the license plate light, which means that the camera turns on when parking, or head lights are on (they turn on in the garage automatically, so works good for this purpose) This allowed us not to run the wire from the rear hatch to the light, but instead install the camera and the transmitter inside the rear hatch handle assembly.

Bottom line - the quality of the camera is pretty crappy, but enough to see when something's near the bumper (i don't need HD for that :))

below are a few pictures of the process. Hope this helps someone.

Could you tell me which Garmin model you got? A picture would be killer. I'm shopping now. The 6" models look to be a decent fit if even a little small. They seem to sit back too deep and quite vertical due to the smaller height than the cubby hole. The 7" models however would sit further out and with a nice factory looking tilt but sound like they'll be too wide and require cutting of the cubby sides. Not sure I wanna do that. At least not unless I get ahold of a spare to experiment with incase I don't like it. Thanks!!
 

Latest posts

Members online

Forum statistics

Threads
36,283
Posts
218,311
Members
30,502
Latest member
heather8635
Top