
avslash
Full Access Member
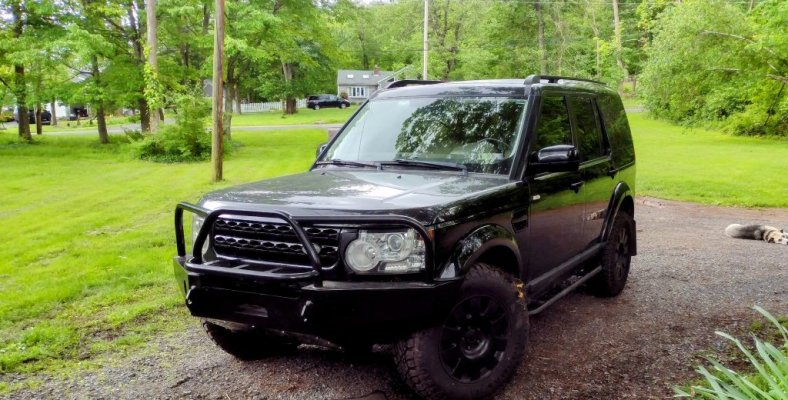
First picture shows how I had to lengthen the cutout to accommodate the winch clutch lever, as well as the notch cut out of the grill. I wish in retrospect that I had angled the corners of the grille cutout. You can only see them from one angle, but if I had angled the corners, it would be invisible.
The blue lines coming out are my air line extensions I can use to manually inflate the front struts in the event of suspension failure. These used to live behind the grille, but the cutting left me with a nice place to make them more accessible in case they are needed.

Second picture shows that I had to cut the thin piece behind the winch opening, as well as notch cut the front of the bumper to accommodate the winch. The cross-bars on the winch are just wider than the standard opening.
I will take the bumper off at some point in the future to have it powder coated again. I just hit it with krylon for the time being to keep the rust off. I admittedly suck with a grinding cut-off wheel, but in person it looks passable. When I get it powder coated again I will have someone that is proficient smooth it out and deburr the edges before it gets coated again. Probably less than 45 minutes of their time, I would guess.

If you attempt this project, just do this with the nuts for the bumper shell bolts. Trust me. $20 bucks at a local welding shop will save you all kinds of grief trying to get a tool on those nuts with the bumper shell mounted. Did I mention that a smokingly hot MILFY chic in yoga pants did the welding for me...

These are why Tactical Rovers "strongly recommends" you replace the factory hardware with grade 8 bits. These are what is holding your winch tray to your Rover if you don't replace them.

And in fairness to Tactical Rovers (which I am very happy with) I should note that if you have the later revision of their front bumper, then none of this should be necessary.
The blue lines coming out are my air line extensions I can use to manually inflate the front struts in the event of suspension failure. These used to live behind the grille, but the cutting left me with a nice place to make them more accessible in case they are needed.
Second picture shows that I had to cut the thin piece behind the winch opening, as well as notch cut the front of the bumper to accommodate the winch. The cross-bars on the winch are just wider than the standard opening.
I will take the bumper off at some point in the future to have it powder coated again. I just hit it with krylon for the time being to keep the rust off. I admittedly suck with a grinding cut-off wheel, but in person it looks passable. When I get it powder coated again I will have someone that is proficient smooth it out and deburr the edges before it gets coated again. Probably less than 45 minutes of their time, I would guess.
If you attempt this project, just do this with the nuts for the bumper shell bolts. Trust me. $20 bucks at a local welding shop will save you all kinds of grief trying to get a tool on those nuts with the bumper shell mounted. Did I mention that a smokingly hot MILFY chic in yoga pants did the welding for me...
These are why Tactical Rovers "strongly recommends" you replace the factory hardware with grade 8 bits. These are what is holding your winch tray to your Rover if you don't replace them.
And in fairness to Tactical Rovers (which I am very happy with) I should note that if you have the later revision of their front bumper, then none of this should be necessary.
Last edited: