
Haverhill1
New Member
- Joined
- Sep 3, 2012
- Posts
- 4
- Reaction score
- 0
When your upper tailgate starts to act up and sometimes won't open,(big emphasis on STARTS) these steps may help fix the issue(s). After completing my own repair, it seems near impossible to access the failed components without first being able to open the upper tailgate. There is a procedure out there (search "butterknife") for getting at the inside of the lower tailgate (where the components are located) without being able to open the upper. However, I just don't see how it's possible without damaging several interior trim pieces and knuckles. So hopefully anyone reading this has caught the problem in it's early stage where the upper sometimes opens and sometimes gets stuck. The steps and pictures below are related to the diagnosis of my specific failure. Obviously, yours may be a different diagnosis, but the steps to getting to the parts and inspecting them will be very similar. It took me about 1 1/2 hours total time, just be patient and don't try to rush through it. Inspect all the mechanical parts, cables and electrical wiring for all the components as you go to troubleshoot other problems.


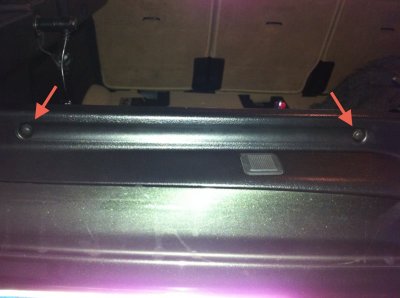
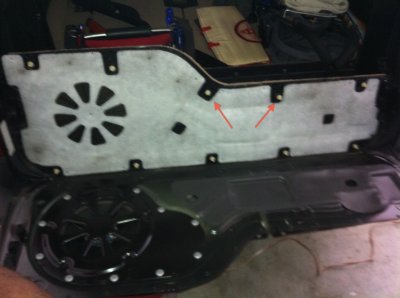
Step 1) Pry off the 4 screw caps pictured above revealing the phillips head screws and remove the screws.

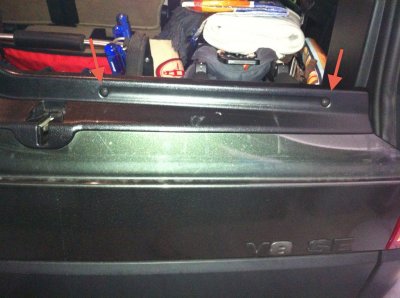
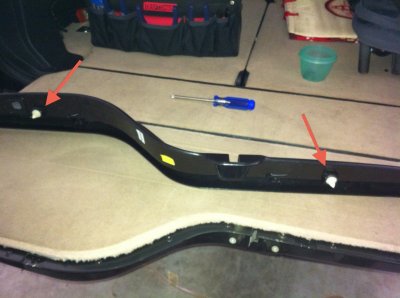
Step 2) Lower the bottom tailgate and remove the trim piece that runs the length of the bottom tailgate. Take note of the placement of the two retention clips for easier removal.

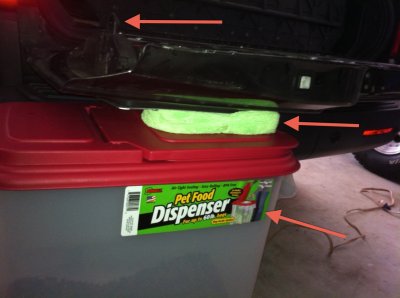
Step 3) Place one dog food storage container and one car wash sponge under the bottom tailgate to support the weight of the tailgate and allow the removal of the two support cables on either end of the tailgate. (it's not necessary to remove the cable from their ball joints-just remove the ball joints themselves) Carefully retract the support cables until they stop at the opening, as letting them go may allow them to get stuck in the opening. Remove the two end trim pieces (surrounding the support cable mounts) by carefully pulling outward on what is now the bottom of those pieces.
CONTINUED ON NEXT POST
Step 1) Pry off the 4 screw caps pictured above revealing the phillips head screws and remove the screws.
Step 2) Lower the bottom tailgate and remove the trim piece that runs the length of the bottom tailgate. Take note of the placement of the two retention clips for easier removal.
Step 3) Place one dog food storage container and one car wash sponge under the bottom tailgate to support the weight of the tailgate and allow the removal of the two support cables on either end of the tailgate. (it's not necessary to remove the cable from their ball joints-just remove the ball joints themselves) Carefully retract the support cables until they stop at the opening, as letting them go may allow them to get stuck in the opening. Remove the two end trim pieces (surrounding the support cable mounts) by carefully pulling outward on what is now the bottom of those pieces.
CONTINUED ON NEXT POST