Brush guard/aux light setups.

Disclaimer: Links on this page pointing to Amazon, eBay and other sites may include affiliate code. If you click them and make a purchase, we may earn a small commission.

Panzerknacker

Full Access Member
Joined
Dec 19, 2009
Posts
221
Reaction score
0
Yeah, cool thanks!

Did the lights come with a wiring harness? Was is difficult? Can you post a pic of where you posted the switch inside Thanks

The lights did come with a wiring harness... I havent hooked them up yet.
 

Bad Bonez BJ

Full Access Member
Joined
Oct 2, 2009
Posts
81
Reaction score
0
CIMG1863.JPG


To install the brush bar I used a 1.25" hole saw, measured down, and cut the hole. Must have been lucky, as it was right on.

I used the OEM light mount brackets on the brush bar and mounts from the bottom of OEM foglights to mount these Bosch fog lights. They came with the covers, but I made the LR badge. Those lights also came with wiring harness and lighted switch.

I love the square look! Matches the look of the car.

BJ
 

DCLR3

Member
Joined
Nov 11, 2009
Posts
12
Reaction score
0
Im thinking tomorrow I will get on it. Just changed all the bulbs in the headlight assembly and I am feeling ambitious.
 

krizza91

Full Access Member
Joined
Feb 12, 2010
Posts
97
Reaction score
1
its finally installed

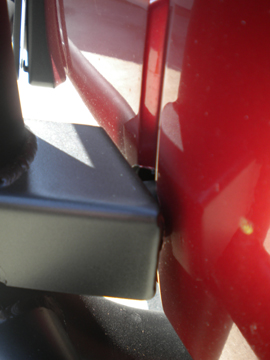
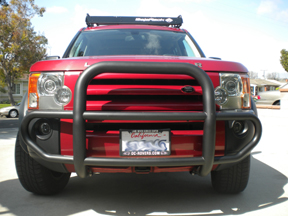
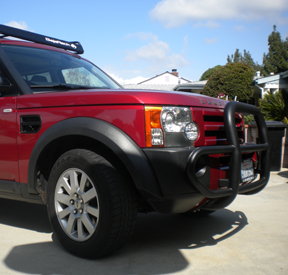
Well after a minor mishap with a nut...(I started an entirely new thread called brush in with brush bar... see for details) it's finally on. I took forum advice (thank you) and drilled a little lower than recommended. it worked out great. I believe I drilled down 80 MM. I hope you can see by the photos that the hole around the long bolt and spacer turned out as clean as you could expect for cutting a 1.25" dia hole into the plastic bumper cover. that wasn't the hard part, I had issues with the nut that is tack welded inside the bumper, came off. what a nightmare. on the instruction booklet step #4 directs you to keep a 20MM gap in order to easily slide the bar onto it, but that did not leave the bolt threaded onto the nut very much. as I pulled the par down to attach the bottom (due to a snug fit) the welded nut sheared off. My recommendation would be to screw the long bolt in farther than the directions recommend because getting a new nut in there was a HUGE pain in the ... anyways, all done and here are some photos. thank you to all who gave advice.
 

Attachments

  • DSCN0431.JPG
    DSCN0431.JPG
    82.4 KB · Views: 195
  • front 01.jpg
    front 01.jpg
    78.5 KB · Views: 213
  • side 01.jpg
    side 01.jpg
    89.7 KB · Views: 213

DCLR3

Member
Joined
Nov 11, 2009
Posts
12
Reaction score
0
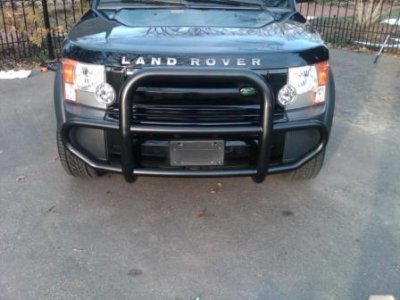
I slightly cheated. I already had a 1.5in hole saw (38mm) so I just used it instead of buying a new one. Driver side hole I hit dead on, passenger was just a lil off center not exactly sure how, but it went on no issues. I meased the exact 70mm/2.75in and no problem. I did what you did, tried the 20mm gap first, took it off then tightend it some more and was ok. Thing is on there like a rock. I drilled the holes, test mounted, washed it, put it all back on. Just need lights now!
 

Attachments

  • Finished Product.jpg
    Finished Product.jpg
    33 KB · Views: 190

Panzerknacker

Full Access Member
Joined
Dec 19, 2009
Posts
221
Reaction score
0
Glad you were able to get it on there Krizza... Looks like I made an oops and forgot to take off the cover for my front recovery loop before installing lol.
 

krizza91

Full Access Member
Joined
Feb 12, 2010
Posts
97
Reaction score
1
that stupid plastic thing! I took it off because the guard was too tight to get the bolts through with it on, besides I did want to get at the hook. I am looking at replacing it with a metal one anyways.
 

angasreid

Full Access Member
Joined
Jun 4, 2007
Posts
267
Reaction score
5
I don't have my good pictures on me right now, but I bought the "Driving Light" accessory from the dealer. I had the wires run and had the dumb plastic lights mounted on the front. Once I had the car back, I cut the wires to the driving lights. Bought some Hella 5000s for mounting on the A-bar.

The mounting for the Hellas was a bit difficult though. I had a friend with a machine shop and we created small aluminum blocks to bolt into the A-bar with pre-drilled holes for the Hellas. Once said and done, all was perfect including the road lighting too. I'll try to get a better picture here sooner or later, but you get the gist.

pic.jpg
 

Latest posts

Staff online

Members online

Forum statistics

Threads
36,272
Posts
218,130
Members
30,499
Latest member
Vintage99
Top