Rear high mount taillight replacement NOT the worst..

Disclaimer: Links on this page pointing to Amazon, eBay and other sites may include affiliate code. If you click them and make a purchase, we may earn a small commission.

MellonRover

Full Access Member
Joined
Apr 7, 2024
Posts
174
Reaction score
130
Location
Northeast USA
Try again...
 

Attachments

  • IMG_20260606_092735693_HDR_AE.jpg
    IMG_20260606_092735693_HDR_AE.jpg
    258.2 KB · Views: 14
  • IMG_20260606_092339399_HDR_AE.jpg
    IMG_20260606_092339399_HDR_AE.jpg
    272.5 KB · Views: 15

powershift

Full Access Member
Joined
Jul 20, 2023
Posts
1,110
Reaction score
388
Location
Nevada
The broken glass was already there before the procedure? On my light its loose in its housing. I figure I'll wait to perform the procedure until its hanging off or it starts moving around a few inches. Now its at 1/4" movement. The problem is the plastic sticks up at the roof side so air flowing over the top of the vehicle is pushing on the light at the lip. 115 mph so far and its still there.
 

MellonRover

Full Access Member
Joined
Apr 7, 2024
Posts
174
Reaction score
130
Location
Northeast USA
Tree took out roof glass and brake light. The crack from tree made it easier to started the removal. Besides It was faded and annoying me so my OCD is calmed now.
 

DaJammer

Well-Known Member
Joined
Jun 9, 2016
Posts
54
Reaction score
19
Good timing on the tool removal recommendation. Thank you! Mine gave me no visual sign that I was about to loose it. But I did last week doing 65 on the freeway. Heard a rattle noise coming from the back. At first thought it was a speaker shorting out or something like that. Then the noise stopped. Then 30 seconds later I heard a bigger flapping type noise, enough for me to look in my rear view mirror and see my brake light leave the vehicle. Luckily the vehicle behind me was a fair distance away and it didn't cause them any issue.

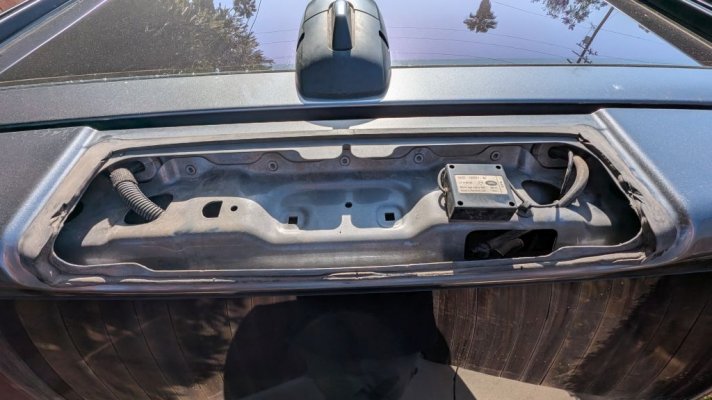
Clean breakaway...here what it looks like now. Though I have since covered it with plastic and automotive type to keep water / moisture out until I receive my replacement light and tackle this project at the weekend. Hopefully this kit will help with the silicone removal. Everywhere I turn on the forums or YouTube, nobody agrees this is a simple task getting the silicone removed. Though I do read a lot more complaints about why in the world LR decided on this method of affixing the brake light to the vehicle.
 

Attachments

  • 3rd brake light.jpg
    3rd brake light.jpg
    120.3 KB · Views: 8

Worzella

Well-Known Member
Joined
Oct 3, 2025
Posts
68
Reaction score
38
Location
Winston Salem, NC USA
DaJammer

Agreed .. what s **** way to attach. Mine is coming off and probably about leave immediately. I went through car wash recently and noticed a little water on back inside window..now I suspect this!

Curious where you ordred a replacement light. I have one in junkyard but probably not worth the effort or will trash it upon removal

Thanks
 

MellonRover

Full Access Member
Joined
Apr 7, 2024
Posts
174
Reaction score
130
Location
Northeast USA
If you can wait, AliExpress or similar has ones that are very reasonable.

Those tools are sharp and slice right through the urethane. Keep the beveled edge pointing up and leave a very thin layer on the body. Then use primer on both body and tail light. The primer can be used to fix spots where you nick the paint as well. Urethane will bond to itself so no need to remove all of the old stuff.
 

Worzella

Well-Known Member
Joined
Oct 3, 2025
Posts
68
Reaction score
38
Location
Winston Salem, NC USA
Mine was unglued on front side and two sides so I managed to just wiggle and pry the rear edge off. I don't plan to try to remove existing adhesive since it is totally bonded to metal. I will clean up plastic and existing adhesive and ordered some Sikaflex 221 to rebond.
 

Latest posts

Members online

Forum statistics

Threads
37,155
Posts
226,377
Members
31,273
Latest member
MArsel
Top