I had this same problem, and couldn't find where anyone else took the route I chose, so I thought I would share my success story here:
When I purchased my '05 LR3 a few weeks ago, the previous owner gave me 2 keys; 1 old key that had stopped working and the second that she finally purchased, and had reprogrammed, the whole $500 thing. I don't know what ever happened to the other original, and neither did she.
Here's what I've found to decide if yours is a candidate for this procedure: If you have 2 keys and only one works, then obviously it's not a vehicle wiring problem. If the bad key will still start the vehicle, then it has not lost it's pairing, and does not need to be repaired to the vehicle. You can also go to a local auto parts store. They often have a battery display, with a tester that will let you know if the remote is sending out a signal. (My good one was, bad one was not.) This would also be helpful if you only have one key.
So my decision was to dig into the bad remote, and replace the battery. Here's how it,s done. (in words, but if there seems to be interest, I took some pics of the process in case some wanted them posted.)
First, you will need the following:
1.) utility knife (box cutter)
2.) flat blade screw driver
3.) soldering iron
4.) desoldering wick (braid)
5.) solder (obviously)
6.) battery (Panasonic VL2330-1HF) I book marked the company I bought it from, but I don't know if I'm allowed to add links on this forum. Cost me $11.40 total.
7.) Super glue ( I like gorilla super glue)
So here we go ( Obviously, I take no responsibility if you ruin your dead nonworking remote that's already ruined. Or if you cut your finger off in this process. If you aren't comfortable trying this, then don't. Is that a legally sound disclaimer? Hope so.)
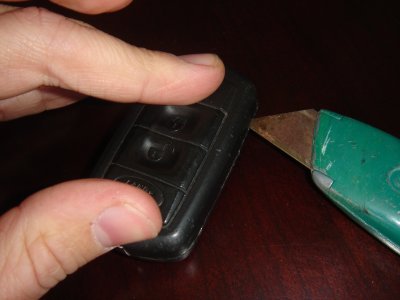
First, start with the knife slowly and carefully pressing and cutting into the crack where the front and back of the remote join. It takes some pressure and patience, but you can tell when you have made it through the rubber and plastic that you are trying to get through. You want to cut all the way around the remote, everywhere that the knife will reach. This only excludes the section the the actual key covers when opened, and the key ring retainer on the bottom. Try not to press the knife any deeper into the remote than necessary for obvious reasons. After you have finished cutting, use the screw driver to slowly separate the two pieces, being careful not to let the spring that loads the key fly away.
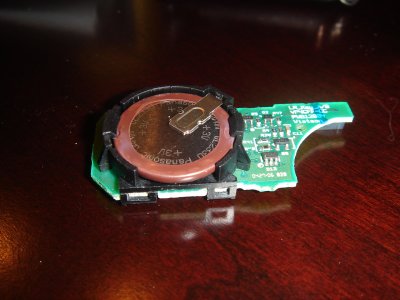
Now you should be looking at the circuit board inside. It will lift right out of the housing. One side will have the button cell battery, and the other side has 3 black buttons on the board. The battery is soldered into place. Locate where the two battery leads come through on the button side of the board and lay the board battery side down on something that will hold the board steady. ( I just used half of the remote case.)
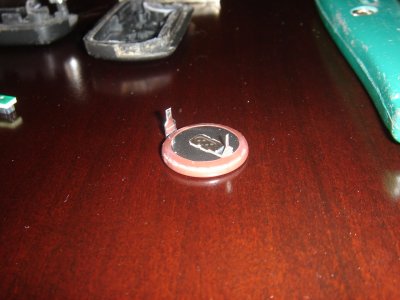
You now need to deslolder the contacts of the battery using the desoldering wick. (You can find pretty good instructional videos on desoldering on youtube.) Once all of the solder is removed, the battery can be removed. It is sort of locked into its black housing.
Now carefully place the new battery in the holder being sure that the leads find their way back into the holes in the board. I found it easier to remove the black holder from the board and put the battery into it first, and clip the holder back onto the board with battery attached.
Place the board battery side down again and solder the battery leads back to the board. At this point, if you'd like you can now find out if the remote is gonna work by pressing one of the black buttons on the board and seeing if the vehicle responds ( mine did). Put the, hopefully working board back into the back of the remote housing.
Put the spring back in place on the back housing, and the button onto the spring. Now you will need to place the button back through the base of the key. This is a little tricky as the button seems to fit in there any way that you place it, but will only open and close properly if it is in correctly. The upper tab on the button should fit into the small slot on the key. Now put the front of of the remote back into place WITHOUT GLUING and check to be sure that the "switch blade" action is working properly. If it seems to be correct, the carefully take it back apart and be sure that you know how the button fits back into the key (you will not have an easy second chance at getting it right.) Make sure to remember the key ring holder also.
Now lay a thin bead of the superglue around the outer edge of the remote back. Ease the remote back together and it's done. I zip tied mine together tightly and left it over night for the glue to fully cure.
Used it all day today and I can now say that I have two working keys. SWEET!!!


 Unfortunately, I couldn't find anyone locally that carried one and the $15 is still better than most of the other places I found online.