OK ...
This is pretty easy if you are handy with tools. Otherwise, you might consider taking it to the dealer.
Remove the upper liftgate inner trim cover by pulling it slowly straight back from the glass. I found it easiest to pull up a corner then work my way around. The lower portion of the trim piece is held in place by the usual captive snap in fasteners. There is a slightly less usual kind, more rectangular, holding the upper portion of the trim. These seem to grab harder, so I found it easier to remove the lower portion first. Some of the white circular usual snap in fasteners will fall off or not come out. Pull these out of the liftgate somehow so you can put them back on the trim piece and replace it later.
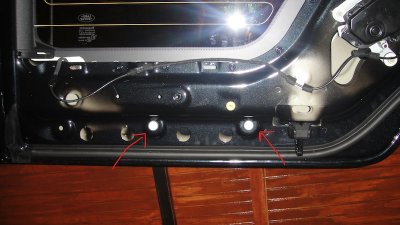
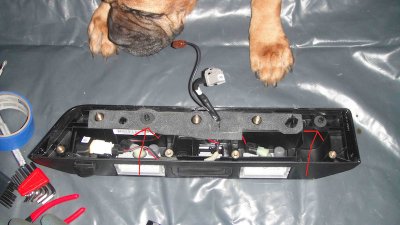
Remove the four visible Torx screws holding the rear liftgate handle in place from the lower edge of the upper liftgate. Remove three additional nuts now visible since you took the above trim piece off. Detach the light cable and rear camera cable (if you have one) at the obvious connectors. Now remove the entire liftgate handle. The instructions indicate the mounting points for ladder hardware clearly. My 2011 had less than 9mm holes already drilled from the factory. The provided rivnuts (rivet-in nuts) require a 9mm hole so these holes had to be enlarged.
Now I don't have access to a 9mm drill bit, but what I ended up doing worked great. I used a step drill bit to enlarge the hole to 9mm. The step bit was an English bit, but this is what I did. 9mm is between the commonly found 5/16" and 3/8" diameters. 11/32" would have been really close, but I did not have a step bit that size. I wanted to use a step bit for a clean hole, more important because of how the rivnut works. I drilled through 5/16" and towards the 3/8" step of the bit, but not all the way to 3/8". I carefully took more and more metal off past 5/16" until the rivnut fit through the hole snugly.
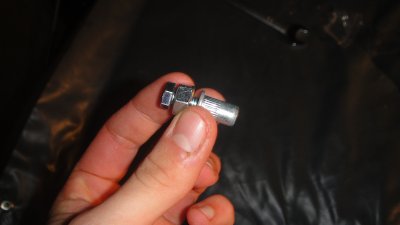
The rivnut was then expanded (works like a rivet). The key was to expand it with the provided screw without having to purchase a specialized tool. I found a slightly oversize regular nut that would slide over the provided bolt without engaging the threads. I used a small edge file and created small grooves in one face of the nut to make sure that it grabs the flange of the rivnut. An appropriately sized star washer would work but I did not have one handy.
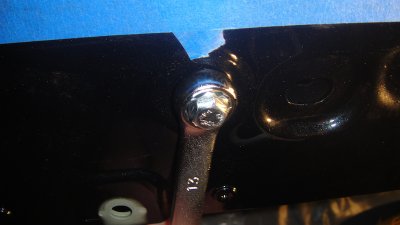
So, put the rivnut in the hole. Slide the modified nut rough face towards the rivnut over the provided bolt. Put bolt-modded nut through the rivnut and finger tighten. Next use a spanner to hold the modded nut in place and use another spanner or socket wrench to tighten the provided bolt. This expands the rivnut in place. Keep turning until you notice the increase in tension. Loosen and remove the bolt and modded nut. Do the same with the other hole. This is probably the hardest part. Not bad really.
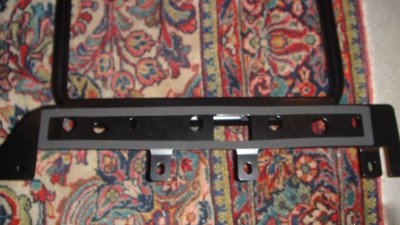
A foam pad has to be attached to the lower attachment plate of the ladder, per the instructions. No problem here. The upper plate has a bent over portion that grabs the upper edge of the upper liftgate. LR provides a large piece of double sided foam tape to apply between the plate and the liftgate. This part is a little hard because when you have the tape in place per the instructions, it is difficult to get the edge of the plate over the door because the tape grabs it before you can get it in position. I probably would trim the tape if I had to do it again so there is little going under the hooked area of the plate. I would also trim it on the other side because the plate is flat whereas the body piece starts curving down. This results in a portion of the adhesive on the tape about 1/2" thick exposed, not doing anything but collecting dirt and dust.
Postion the ladder correctly and bolt it down to the rivnuts. You can now re-attach everything you dis-assembled earlier.
I'll try to get some finished pics up ...