Rear Tail Third Brake Stop Lamp

Disclaimer: Links on this page pointing to Amazon, eBay and other sites may include affiliate code. If you click them and make a purchase, we may earn a small commission.

Land Rover Joe

Full Access Member
Joined
Apr 10, 2011
Posts
423
Reaction score
117
Location
Oxford
Tribe,

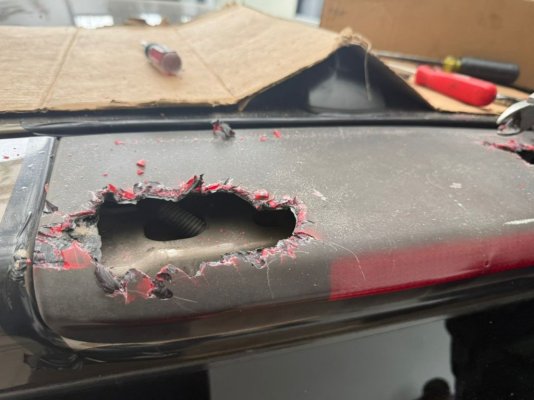
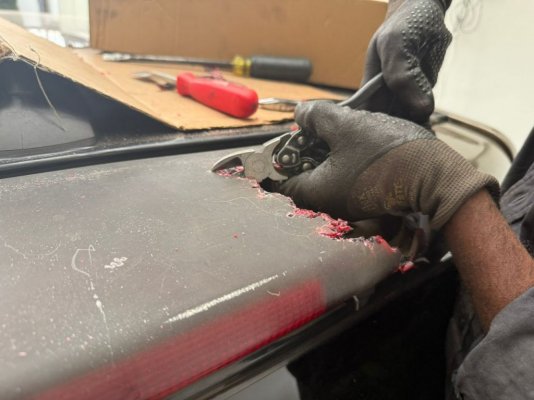
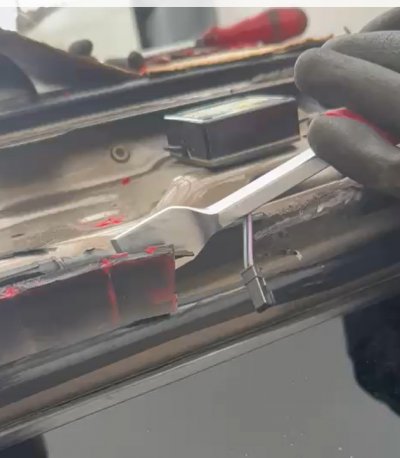
In addition to all the other work to do, I am going to be replacing the "Rear Tail Third Brake Stop Lamp" on my 2010 LR4 HSE (HD). This is the plastic raised tail light above the rear window.

Mine has gotten pretty beat up, cracked, and I think might be leaking...so time to swap that out as well.

I have purchased a new OEM unit from Lucky8 and wondering if folks have tackled this little project.

Many thanks!
 

BBLR3

Full Access Member
Joined
May 30, 2010
Posts
114
Reaction score
69
Location
St Petersburg, FL
Ive done mine. Wasnt too hard to do. Used a 3M urethane sealant. Cleaned off the old sealant the best I could on the metal. Apply new sealant, attach washer fluid hose and electrical connector, squish down the new cover. Put painters tape on overnight to hold everything in place.
 

powershift

Full Access Member
Joined
Jul 20, 2023
Posts
1,105
Reaction score
385
Location
Nevada
I'm curious how its removed to put the new one in? Mine is a bit loose and moves around 1/8", but I hear they are a b to remove so I was leaning on that lol.
 

ugmw177

Full Access Member
Joined
May 25, 2023
Posts
170
Reaction score
107
Location
Charlotte NC
you basically have to break it up in pieces to remove then spend some time removing the adhesive [kid of similar to windshield adhesive]
 

Land Rover Joe

Full Access Member
Joined
Apr 10, 2011
Posts
423
Reaction score
117
Location
Oxford
Thanks All - and indeed, I now found last year's threat from @D_Walt on this subject:


Land Rover Joe

Full Access Member
Joined
Apr 10, 2011
Posts
423
Reaction score
117
Location
Oxford
I'm curious how its removed to put the new one in? Mine is a bit loose and moves around 1/8", but I hear they are a b to remove so I was leaning on that lol.
Thanks @powershift - that was why I was asking but there is some pretty good advice here and @D_Walt posted some great photographs.

There is a PowerfulUK video on removing the thing...but they really screwed the thing up and banged up the metal trying to get the thing off (and didn't actually show their attempt at removing the old assembly). I won't post their videos or make further comments on that because I had a relatively recent not-positive experience with PowerfulUK.

All that said, it appears that as these parts get older, the glue looses its effectiveness and makes this job a bit easier; it seems if you have the right car wash...they will even dismount it for free!

I think, as @ugmw177 commented and are illustrated in the photos from @D_Walt - I will need to cut the plastic up (carefully) and then strip all the old glue off. That seems to be where the artistry is....

Thanks to all and I will post photos once I arrive to this phase -
 

Land Rover Joe

Full Access Member
Joined
Apr 10, 2011
Posts
423
Reaction score
117
Location
Oxford
Thanks again Tribe - some Photos from this job attached ~

As noted, you can see the breaking up of the plastic light in those photographs.

After pulling things apart (and some drilling) - We used a gasket scraper as a chisel to separate the plastic and glue bits from the body (metal).

That said, we did scratch the paint in a number of places (down to the primer).

We have installed and glued the new light assembly on, but will now try and do a little touch-up painting / bodywork on the areas we banged up.

Hard not to scratch something when doing this...

Hope this helps others and we could not have done it without everyone's help and experiences!
 

Attachments

  • 007.jpg
    007.jpg
    102.4 KB · Views: 80
  • 008.jpg
    008.jpg
    104.3 KB · Views: 84
  • Removal.jpg
    Removal.jpg
    82 KB · Views: 76

Latest posts

Members online

Forum statistics

Threads
37,146
Posts
226,329
Members
31,263
Latest member
KyleK951
Top