Project Dark Knight Rising

Disclaimer: Links on this page pointing to Amazon, eBay and other sites may include affiliate code. If you click them and make a purchase, we may earn a small commission.

Tapps33

Full Access Member
Joined
Jul 23, 2019
Posts
385
Reaction score
325
Location
Bath, Maine
I hope you know that a lot of folks are proud of you and also thankful for all of your efforts in documenting this; we’ll be referencing this thread for years to come, not just for the swap, but for pictures of things we can’t see without removing something ourselves, and methods on how to get to something.
I'm glad y'all like it, I'm trying to provide an in depth swap description so that if anyone ever wants to try this again, most of the issues they'll run into will be covered here.

That said, each swap will be different, and I'm sure others will run into completely different issues than I did....probably make fewer mistakes too.
 

Tapps33

Full Access Member
Joined
Jul 23, 2019
Posts
385
Reaction score
325
Location
Bath, Maine
Ok, so a few notes as I finish packing the Uhaul and hit the road today.

First, I discovered the power steering cooler is slightly different between the SC and NA models, so I'll be swapping that out in the next few weeks. The NA cooler dips down and interferes with the intercooler, the SC version is a lot straighter, and doesn't dip down.

Here's the difference:
NA Power Steering Cooler.jpg


SC Power steering Cooler.jpg


I tried to program the PCM yesterday, but ran into issues with it crashing when uploading the software via the SDD. I have a feeling this is going to be a huge trial and error sort of thing...especially since I don't really know how to use the SDD tool all that well. GAP has already told me they won't help, and the company in Australia isn't responding. That said, I may try calling them and seeing if they can help. Because the PCM is from a RRS, I'm getting an ABS fault because the software is completely different, and there's things like Adaptive Dynamic Suspension and roll control that the LR4 doesn't have. I'll keep y'all updated as I progress through the process, but it'll be a few weeks before I can get back to it....and when I do get back to it, it's going to be a lot of finishing the cooling hoses, putting all the plastics and bumpers back on etc... Then, I'll need to wire the intercooler pump up and then I think I can try and get it running. Still a laundry list, but all in all things a moving forward!

For now though....


IMG_0256.jpeg


It's time to hit the road!
 

Tapps33

Full Access Member
Joined
Jul 23, 2019
Posts
385
Reaction score
325
Location
Bath, Maine
Well, move is complete...ish. LR4 is stashed at my parents house, and now I just need a weekend to get back to it!

A couple things before that I wanted to share:

1st, the power steering cooler. Here's a good pic so you can see how the NA cooler lines up wrong, but the "straight" SC. one will work.


IMG_0268.jpeg


Next, while separating the body, most videos I found said the only way you disconnect the fuel filler neck was to reach up under and around and unscrew the 8mm bolt holding it in. Well, I found a better way. The fuel filler door is simply held in place by 4 retaining clips which can be GENTLY pried down to release the filler door....then the bolt is right there, easy peasy!


IMG_0254.jpeg


IMG_0253.jpeg


Finally, some symposer lessons learned. If you're going to remove the symposer as I did, there as a few things you need to know. First, you need to take everything off the bracket, except for the solenoid and re-use the bracket. It has a wire loom mounting point. Second, while I've heard having the solenoid disconnected won't throw any codes, most recommend leaving the solenoid plugged in...so the PCM/BCM thinks the symposer is still there. Finally, there's a vacuum tube that runs into the symposer solenoid. I thought I could get rid of it, but you can't. It's actually part of the vacuum system. That said, you need to remove the leg that runs to the solenoid and cap it off. I'm sure there's a better way to do it, by heating the tubing and ditching the 3-way in favor of a 2-way coupling, but I didn't want to mess up the tubing, so a little rtv, a vacuum cap and a zip tie and I was able to connect the vacuum tube to the left hand, rear, lower side of the SC....which then runs around and ties into the vacuum line coming from the vacuum pump and brake booster. Not gonna lie, I initially thought it was a pressurized line coming off the SC, but I found the diagram in the manual and traced it all the way around. Who knew...

Here's a couple pics of the vacuum tube, and where it tuck in....there's also a tube clip on the symposer bracket, yet another reason it's better to leave it on.

IMG_0252.jpeg


IMG_0251.jpeg


That's all for now....I really hope to be up to get back to work on this project really soon....I'm SOOOO close, just a few finishing details, then the whole PCM fight. Other than that though...vroom vroom!
 

Tapps33

Full Access Member
Joined
Jul 23, 2019
Posts
385
Reaction score
325
Location
Bath, Maine
Hey All!! Well, it's been a hot minute, but I finally got all the "to-do" list taken care of at my mom's place, and FINALLY had a few minutes to work on my project!

I wish I could report it fired up and ran great...but I'm not quite there yet. I had to order a few new parts to finish the SC belt routing and fan installation. I believe I've already mentioned this, but in case I haven't, there are a couple differences between the NA and SC fan pulleys, as well as between the JAG and LR setups. The biggest difference is the fact that the NA engine has a 4 rib belt and the SC has a 6 rib. The JAG engines run electric fans, so instead of a fan pulley, they just have another 6 rib spacer pulley. While it forced me to get another part, it's actually kinda nice because I ultimately plan on switching to electric fans in the future, and this means I have the parts to do it! Plus it means there's probably an easy way to tell the system to forget about the viscous fan!
Here's a quick pic of the differences between the pulleys:

IMG_1002.jpeg


All installed nicely:

IMG_1007.jpeg


IMG_1008.jpeg


I also swapped out the charcoal canister on the AC system since I disconnected the AC lines to remove the body. I know the jury is out on whether this was necessary, but given the fact I didn't seal the lines up, it's been sitting for almost 3 months, and it's already 12 years old, I figured why not.
IMG_1005.jpeg


After the serpentine was installed and charcoal canister was replaced, I swapped the power steering fluid cooler out. This did require a trip to Auto zone for a fuel line separator tool...as my existing kit is in storage somewhere...to get the "rack side line" disconnected. Since I had the cooling stack out, the swap was really easy as I re-installed the stack back into the vehicle.

IMG_1006.jpeg


On a side note, it was only when I was routing the power steering lines that I realized I couldn't find the banjo bolt for the pump....insert face palm here. So, after what seemed like forever scouring the internet to find the part number, I finally found the seals and banjo bolt parts: LR020213 (washer, you need 2) and QFM100041 (Banjo bolt). These are now on order and are due in sometime next week.

Once I settled the Power steering system...or the fact that I had gone as far as I could without the new bolt, I turned my attention to the cooling system. In theory I had already ordered all new hoses for the vehicle...in reality, I missed like half of them! AAAAAGGGGGHHHH!!!! Full disclosure, there's a chance there in a box somewhere, I just can't find them. So, I put everything where it's supposed to go and realized I needed to order 8 more hoses. Seriously...packing your project up and moving it can be a giant PITA sometimes. Anyway, all the requisite hoses are now on order and should be here sometime next week. Which is good because I'm headed back to work on it next weekend!

Finally, I decided to bite the bullet and pull the trigger on a new air cleaner system. I could have easily purchased a used SC intake, but this one just looks a little cooler!


Do I believe their hype that it adds all this power? No, not really, but I feel like it'll make the engine a little louder, sound a lot better when I get on it....and it just looks cool!

Till next time! With a little luck, I'll be able to fire this thing off during Thanksgiving Weekend! Fingers crossed!
 

txfromwi

Full Access Member
Joined
Dec 18, 2013
Posts
576
Reaction score
307
Location
2013 & 2015 Houston TX. 2016 Montreal, QC
Now that's a serious project !!

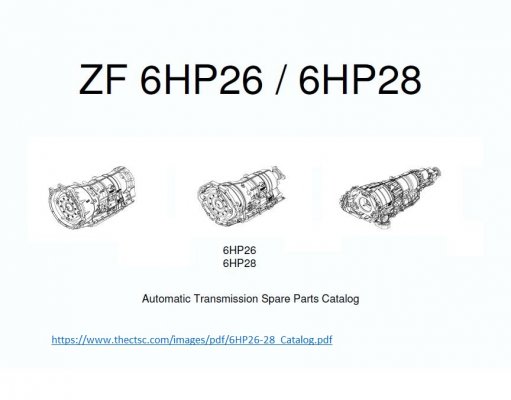
Yes, the ZF 6HP 26 and 28 are identically mechanically.
They produce different torque outputs and that is via the mechatronic and the software.

If you pull the attached document it lists every mechanical part, and they are all identical.
 

Attachments

  • Spare Parts Catalogue.JPG
    Spare Parts Catalogue.JPG
    75.6 KB · Views: 19

Tapps33

Full Access Member
Joined
Jul 23, 2019
Posts
385
Reaction score
325
Location
Bath, Maine
@Tapps33 , I have been following along. This project of yours excites me. Wishing you all success. Thanks for taking this on!

Thanks for the well wishes! I'm getting close, but the hardest part is yet to come, and that's figuring the SDD tool out enough to unlock and integrate the PCM to get the car to start!!
 

itsaguything

Full Access Member
Joined
Mar 7, 2023
Posts
352
Reaction score
146
Location
Manotick, On, Canada
yeah… in the jaguar forums many have swapped files and configurations around…. Do you know this thread: https://www.jaguarforums.com/forum/xk-xkr-x150-33/ids_sdd-deep-dive-ids\xml\ivs-asbuilt-264411/
or this one:
 

Tapps33

Full Access Member
Joined
Jul 23, 2019
Posts
385
Reaction score
325
Location
Bath, Maine
yeah… in the jaguar forums many have swapped files and configurations around…. Do you know this thread: https://www.jaguarforums.com/forum/xk-xkr-x150-33/ids_sdd-deep-dive-ids\xml\ivs-asbuilt-264411/
or this one:
Actually, I haven’t seen those before. Definitely gonna go play with the SDD files. That said, most of what I need to do is correctly code the vehicle keyless module and PCM so they talk and play nice. If those two like each other, it should unlock the ignition and the car will start….in theory.
 

Tapps33

Full Access Member
Joined
Jul 23, 2019
Posts
385
Reaction score
325
Location
Bath, Maine
It's been a minute, but in truth I haven't made a ton of progress. I did manage to get the power steering pressure line reconnected with a new banjo bolt and washers. (Still can't believe I lost the originals...smh). I also got the remaining hoses in place, I just ran into one small issue.
First off, the LR4 radiator does indeed have all the proper mounting points for the intercooler water pump bracket. The only thing I'm missing is the plastic pin (part number: PYT500011) that goes through the bottom of the bracket and is the 2nd point of contact for the mounting bracket. Unfortunately, as I have found, they no longer sell the plastic pin, so I'm going to have to get creative.

Here's a quick pic of the pin (it's HM1 in the diagram):


Screenshot 2024-11-24 at 8.19.53 AM.png


So, I think my strategy is to mount it using a bolt, nut, 2 washers and some hose, kind like a plumping test plug. Not ideal, but I bet it'll absorb vibrations well, and will last for a long time...plus it's "universally adjustable" with the rubber hose in essence squishing to fit into the radiator and bracket. Capped on both ends with a washer, it should secure the bracket nicely and I'll be good to go! (Especially since there's a second point of contact above where the bracket "clicks into" the radiator.)
Just FYI, I'm sure I could run a nut and bolt all the way through the radiator as the hole goes al the way though the side, but in order to access the front of the bolt, the font bumper would have to be off, and I don't want to have to pull that in order to remove the bracket.

So, a quick trip to the auto parts store for some hose and freon, and then I'll get it all together over the holiday, then we'll see what happens! Fingers crossed I've got the coolant system all sealed up!!

Not gonna lie, having the car 3+ hours away is killing me!!!!
 

Members online

No members online now.

Forum statistics

Threads
36,576
Posts
221,393
Members
30,733
Latest member
2007LR322HSE
Top