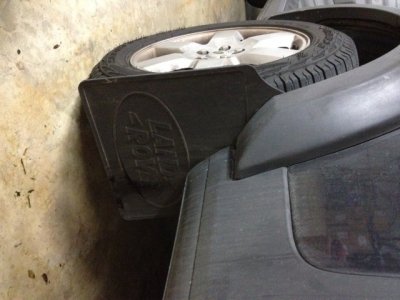
After seeing a 20ft spray coming off the back of my tires I decided to put on some mudflaps. The OEM flaps are less than ideal, I wanted to get some nice and big rubber ones. Here is what I did.
Parts:
---------------------------------------
Front: RRC mud flaps. Purchased from Rovers North. You need 2 as they are sold individually: http://www.roversnorth.com/store/p-4256-mud-flap-range-rover-classic.aspx
Rear: Series III mud flaps. Also purchased from Rovers North. Only need 1 as they are sold as a pair: http://www.roversnorth.com/store/p-1344-mud-flap-kit-rear-pair-series-iia-iii.aspx
Hardware
1/4" plastic rivets. Purchased from Lowes. Pictures Here:
http://www.mack73.com/hosted/cars/LR3/IMG_7943.jpg, http://www.mack73.com/hosted/cars/LR3/IMG_7945.jpg
2 piece pastic rivets. Purchased from McMaster-Carr: Item # 98295A302. http://www.mcmaster.com/#98295a302/=eb2key . Picture here: http://www.mack73.com/hosted/cars/LR3/IMG_7942.jpg
3ft aluminum flat bar. I bought a piece 1/2" x 1/8" x 3'
Rear:
---------------------------------------
I started with doing the series III ones as some have done over on disco3.co.uk: http://www.disco3.co.uk/wiki/index.php/Mud_flaps
You need to trim the inner side to fit around the exhaust. But once you cut the top corner off, the mud flap starts to loose it's shape and cup. To fix this I got a piece of scrap aluminum and attached it with plastic rivits that I got from McMaster-carr to the bottom of the flap. This added some needed rigidity.
To mount the mud flaps I drilled a series of holes through the plastic lines and one through the wheel flare molding. You can reuse 1 attachement point. I started out by using the mounting hardware that came with the mudflaps, but I think I am going to change these out with the plastic rivets I used on the fronts.


Last edited:


