Cooling System/Crossover Pipe

Disclaimer: Links on this page pointing to Amazon, eBay and other sites may include affiliate code. If you click them and make a purchase, we may earn a small commission.

Joined
Apr 12, 2024
Posts
20
Reaction score
2
Location
33021
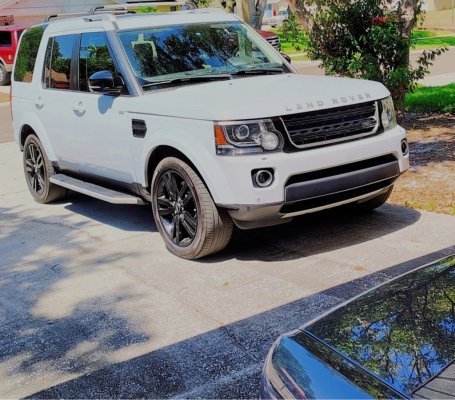
Just picked up a 2016 Landmark after a couple of years of searching and noticed that it is leaking coolant, barely, but it is leaking from the water pump. Not a big deal, since I had planned on changing out the entire cooling system anyway, well most of it. Here is the estimate I got from an indy shop. What do you all think?

I initially thought about doing it myself but now thinking about handing the job off. I am familiar with working different engines, including my Jaguar XJ8, owned for a while, so I have not been to a shop in ages.

Total Cost estimate for job is $2800. $3900.00 with Radiator. This sounds more like dealership cost?

Water Outlet Plug 1.00 6.13 6.13
Water Pump - w/ 2 Gaskets 1.00 244.26 244.26
Drive Belt-Water Pump, Alternator and 1.00 86.50 86.50
Compressor
Coolant Pipe - w/o Inner O-Ring 1.00 33.61 33.61
Oil Cooler Seal 1.00 9.70 9.70
Coolant Outlet Flange 1.00 162.73 162.73
Coolant Pipe - Aluminum Design 1.00 66.30 66.30
Coolant Pipe - Plastic Version 1.00 64.84 64.84
Coolant/Antifreeze Orange Dex-Cool 1 1.00 17.50 17.50
Gal
Cooling Hose 1.00 65.86 65.86
Thermostat Assembly 1.00 123.12 123.12
Intake Manifold Gasket 2.00 19.39 38.78
Local Delivery 1.00 3.75 3.75
Intake Plenum Gasket 1.00 71.90 71.90
**Shop Supplies 28.59
 
Joined
Apr 12, 2024
Posts
20
Reaction score
2
Location
33021
The Image isn't a good one.
 

Attachments

  • LR4 PIcture.JPG
    LR4 PIcture.JPG
    235.1 KB · Views: 7
Joined
Apr 12, 2024
Posts
20
Reaction score
2
Location
33021
I am pondering it for sure, and thanks for the tip about utilising OEM parts. I will have to estimate the time factor to ensure it doesn't become a month-long project due to professional obligations. What is the approximate time required for this job?
 

djkaosone

'11 LR4 HSE LUX 5.0L V8
Joined
Oct 26, 2015
Posts
1,089
Reaction score
756
Location
SoCal
Assuning you'll be replacing front/rear crossover pipes, water pump, oil cooler pipe, and thermostat it should take you 4 hours tops. BUT there's always 1 or 2 non-compliant bolts that'll just ruin that timeline. :beer:
 

Land Rover Joe

Full Access Member
Joined
Apr 10, 2011
Posts
136
Reaction score
15
The forum is not the only courage you can unbottle...there are quite a number of YouTube out there (between Disco 4's and LR4's) of folks working on the cooling system.
 
Joined
Apr 12, 2024
Posts
20
Reaction score
2
Location
33021
I used ChatGPT to create print version, I like a bit of an old fashion type of instruction. I attempted to iron out the guide as best as possible- I will be replacing Serpentine Belt, cooling hose, Intake Gasket and Plenum and perhaps a few more items. Did I miss anything?


Complete Cooling System Overhaul – 2016 LR4 3.0L Supercharged​


Replacing:​


  • ✅ Rear heater crossover pipe (coolant manifold)
  • ✅ Front upper and lower crossover pipes
  • ✅ Thermostat housing
  • ✅ Water pump
  • ✅ Intake/supercharger gaskets
  • ✅ All O-rings
  • ✅ Coolant


TOOLS & PARTS​


Tools:​


  • 1/4” & 3/8” ratchets, long extensions, universal joints
  • Torque wrench (in-lbs and Nm)
  • Hose clamp pliers (spring and worm)
  • Quick-connect coolant hose tool (for heater lines)
  • Flathead screwdriver, picks, plastic trim tools
  • Shop towels, catch pan, gloves
  • Coolant funnel or vacuum fill kit (recommended)

Parts:​


  • Water pump w/ gasket
  • Thermostat housing
  • Front upper crossover pipe (valley pipe)
  • Front lower coolant pipe
  • Rear heater crossover pipe (coolant manifold)
  • Intake/supercharger gaskets
  • New O-rings for all connections
  • Land Rover HOAT coolant (or Zerex G-05; ~3 gallons mixed)


⚠️ PREP​


  • Work on a cold engine.
  • Disconnect negative battery terminal.
  • Raise vehicle if needed (ramps or jack stands).
  • Remove engine cover.


STEP 1: DRAIN COOLANT​


  1. Remove the front undertray.
  2. Place a large drain pan under the radiator.
  3. Open the radiator drain plug (driver’s side, lower corner).
  4. Crack open the coolant expansion tank cap to speed flow.
  5. Disconnect the lower radiator hose if needed for extra drainage.


STEP 2: REMOVE INTAKE SYSTEM & SUPERCHARGER​


  1. Remove air intake tubing and MAF connectors.
  2. Remove the throttle body (4 bolts).
  3. Disconnect vacuum lines, MAP sensor, bypass actuator wiring.
  4. Release supercharger belt by rotating tensioner (15mm).
  5. Remove supercharger mounting bolts.
  6. Disconnect intercooler coolant hoses (have towels ready).
  7. Lift the supercharger assembly straight up and set aside.
  8. Remove intercooler adapters and gaskets.

Cover open intake ports with shop towels to avoid contamination.


STEP 3: REPLACE FRONT CROSSOVER PIPES​


Upper Front Crossover Pipe (valley pipe):​


  • Disconnect small coolant hoses.
  • Remove the 2 mounting bolts.
  • Pull pipe upward to remove.
  • Install new pipe with fresh, lubricated O-rings.
  • Torque bolts to 10 Nm (89 in-lbs).

Lower Front Coolant Pipe:​


  • Disconnect hoses to radiator and thermostat housing.
  • Remove pipe mounting bolt(s).
  • Pull pipe free.
  • Install new pipe with O-rings and torque to 10 Nm.


STEP 4: REMOVE & REPLACE THERMOSTAT HOUSING​


  1. Disconnect the lower radiator hose and small return hose.
  2. Remove thermostat housing bolts (usually 3–4).
  3. Clean the mating surface thoroughly.
  4. Install new housing with fresh O-rings.
  5. Torque housing bolts to 10 Nm.
  6. Reconnect hoses securely.


STEP 5: REMOVE & REPLACE WATER PUMP​


  1. Disconnect small coolant hoses connected to the pump.
  2. Remove 6 water pump bolts.
  3. Clean old gasket material from engine surface.
  4. Install new water pump with gasket.
  5. Torque bolts to 10 Nm.


STEP 6: REPLACE REAR HEATER CROSSOVER PIPE​


Now accessible with the supercharger removed — no need to remove the windshield cowl unless more space is required.

  1. Use quick-disconnect tool to release heater hoses at firewall.
  2. Remove the 2 bolts at the rear of the cylinder heads.
  3. Pull the crossover pipe out carefully.
  4. Clean mating surfaces and remove any remaining O-rings.
  5. Install new O-rings and insert new pipe.
  6. Torque rear bolts to 10 Nm.
  7. Reconnect heater hoses (ensure they click/seat fully).


STEP 7: REASSEMBLY​


  1. Reinstall lower coolant pipe hoses.
  2. Reinstall supercharger:
    • Use new gaskets.
    • Reconnect all vacuum lines, sensors, intercooler hoses.
    • Torque supercharger bolts to 25 Nm, in a crisscross pattern.
  3. Reinstall throttle body and intake duct.
  4. Reinstall serpentine belt and tensioner.
  5. Reconnect battery.


STEP 8: REFILL & BLEED COOLANT SYSTEM​


Option A – Vacuum Fill (preferred):​


  • Use vacuum coolant refill tool to avoid air pockets.

Option B – Manual Fill:​


  1. Close radiator drain and reconnect all hoses.
  2. Slowly fill expansion tank with 50/50 HOAT coolant.
  3. Set HVAC to full heat.
  4. Idle engine with expansion tank cap off.
  5. Squeeze upper radiator hose to burp air.
  6. Watch for bubbles; continue topping off until level stabilizes.
  7. Once engine is warm and fans run, shut off and allow to cool.
  8. Recheck coolant level and top off as needed.


✅ FINAL CHECKLIST​


  • All parts replaced with new O-rings/gaskets
  • Hoses properly reconnected and clamped
  • All bolts torqued to spec
  • Coolant filled and bled
  • Engine idles properly, no leaks
  • Heater blows hot
  • Coolant level stable after cooldown


TORQUE SUMMARY​


ComponentTorque
Supercharger bolts25 Nm
Water pump bolts10 Nm (89 in-lbs)
Thermostat housing bolts10 Nm
Front/rear crossover pipe bolts10 Nm
 
Last edited:

Latest posts

Members online

Forum statistics

Threads
36,731
Posts
222,862
Members
30,902
Latest member
landylou
Top