Cracked fan shroud? Engine jumped off mount?!

Disclaimer: Links on this page pointing to Amazon, eBay and other sites may include affiliate code. If you click them and make a purchase, we may earn a small commission.

allegro

Well-Known Member
Joined
Apr 10, 2018
Posts
63
Reaction score
21
Location
Northern California
Checking the fit of the new shroud pieces before securing everything… I’m concerned that the passenger side of the lower shroud has only 1/8 inch clearance from the fan. Does this look right? The drivers side has more like 1.5 inches clearance.
 

Attachments

  • 5F742FFD-53E8-4E11-BBEC-37F980733622.jpeg
    5F742FFD-53E8-4E11-BBEC-37F980733622.jpeg
    164 KB · Views: 60

allegro

Well-Known Member
Joined
Apr 10, 2018
Posts
63
Reaction score
21
Location
Northern California
Feel crazy saying this… but looking more closely I swear the engine is shifted over about 1/2 inch toward the passenger side. Granted I am grasping for an explanation of why the shroud and fan don’t seem to
be aligned…

Is there a way to check engine mounts and ensure all is ok? Don’t these clearances on passenger side of engine compartment seem smaller than normal?
 

Attachments

  • image.jpg
    image.jpg
    176.2 KB · Views: 51

Stuart Barnes

Full Access Member
Joined
Oct 27, 2019
Posts
443
Reaction score
237
Location
Los Angeles
Double check the radiator positioning first. It’s easier to eyeball.

And triple check you’ve installed the shroud correctly. I’m sure on mine the clearance between the fan blades and the brush part is less than 1/2”
 

allegro

Well-Known Member
Joined
Apr 10, 2018
Posts
63
Reaction score
21
Location
Northern California
Double checked radiator position and shroud mounting, and still seems wonky.

I’m looking up engine mount inspection in the service manual and will check it out to satisfy my curiosity. Peering down in the left/drivers side of the engine compartment, isn’t this where an engine mount bolt should be?

I think perhaps the mounting flange is sitting on top of the mount bolt.. seems just barely visible in this shot:

ECB6C9DE-AB6E-4B7B-952A-2B9D64D222B8.jpeg

Is there a way to try to gently coax the engine back to the drivers side, if this is what I think it is?
 

Attachments

  • 5F55D52E-0DAE-489B-8994-3A181F40A087.jpeg
    5F55D52E-0DAE-489B-8994-3A181F40A087.jpeg
    98.4 KB · Views: 41

allegro

Well-Known Member
Joined
Apr 10, 2018
Posts
63
Reaction score
21
Location
Northern California
Smoking gun… any bright ideas on how to proceed from here to get the engine seated properly on the mount?

0CECDADE-AF08-4236-A603-46C67172FBCA.jpeg

Again, this is left/drivers side. My wife’s sudden on/off/on throttle must have jumped the engine off the mount.
 

Stuart Barnes

Full Access Member
Joined
Oct 27, 2019
Posts
443
Reaction score
237
Location
Los Angeles
Do you have the workshop manual. I’m sure there’s a procedure in there for changing them out. If you don’t pm me and I’ll get you sorted.
 

allegro

Well-Known Member
Joined
Apr 10, 2018
Posts
63
Reaction score
21
Location
Northern California
Update - Both left and right engine mounts were missing their securing nuts. Who knows how long the engine has been just floating on the mounts waiting for an incident like this throttle on/off/on event to rock the engine off the mounting stud. Perhaps the shop that lifted the engine out a couple years ago failed to torque them properly? In any case, not confidence inspiring... I'm going to go ahead and replace both mounts and use fresh hardware. Parts are on order. A little daunted by the exhaust/cat disassembly required, but we'll cross that bridge when the new parts arrive.

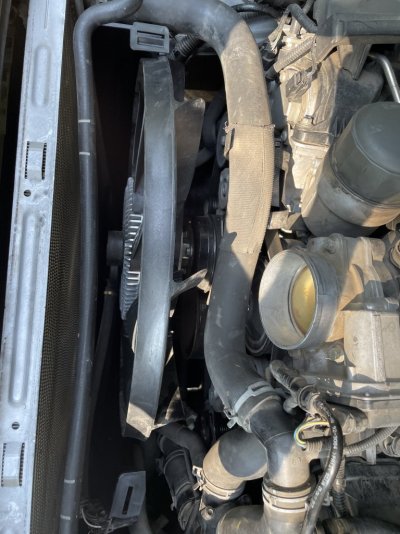
In the meantime, I lifted up the engine up off the engine mount stud and was able to reposition it so that it lined up properly with with mounting bracket attached to the engine. I secured the engine on both sides with temporary M12 flange nuts and some blue thread locker. Fan now lines up perfectly with the new shroud.

On first fire up after putting everything back together, there's no CEL but my GAP tool is showing two codes:

P0526-17 (Fan speed sensor circuit - General electrical failure - circuit voltage above threshold)
Workshop manual says: Viscous fan circuit, short circuit to ground, short circuit to power, open circuit
My next step: double check fan harness connection (fan is operating when engine on, so not sure about this)

P061A-64 (Internal control module torque performance - Algorithm based failure - signal plausibility failure)
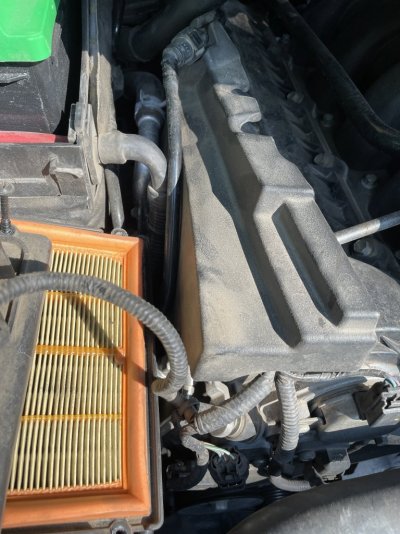
Workshop manual says: Intake system air leak; Manifold air flow sensor(s) failure
My next step: double check intake connections from reassembly

Also, while I had the sump guard / skid plate off I checked the various drain plugs... found the front diff drain plug to be loose to the touch! Disaster averted. Torqued up now and awaiting the proper fluid for a drain + fill.
 

allegro

Well-Known Member
Joined
Apr 10, 2018
Posts
63
Reaction score
21
Location
Northern California
The end of the story, for now at least! The vehicle had been working well for the past few days, engine mount nuts are holding tight,
cooling fan working great.

The strange fault codes went away after I fiddled with the coolant temp sensor (I read so many other forum posts about its strange implication in electrical gremlins, figured couldn’t hurt!) and did a vehicle reset by unhooking battery cables, resting for 10 mins, and touching the cables together. #lr4voodoo

The proactive front diff oil change led me down an internet rabbit hole when well more than the prescribed 0.64qt came out in the drain pan… supposedly (some? all?) LRNA mechanics do fill the front diff to the fill plug hole rather than stopping short as the service manual instructs us to do. I decided to go by the book with my refill.

Shout out to @Stuart Barnes for his help and the youtube video collection, and gratitude to all for offering advice along the way.
 

Stuart Barnes

Full Access Member
Joined
Oct 27, 2019
Posts
443
Reaction score
237
Location
Los Angeles
Glad everything worked out in the end for you Allegro.

For future reference I've just posted a video on how to remove the fan shroud and the fluid coupling/cooling fan unit or motor as Land Rover call them. Just be careful on YouTube, there's a lot of butchery out there.


Latest posts

Members online

Forum statistics

Threads
36,223
Posts
217,601
Members
30,474
Latest member
sawcut
Top