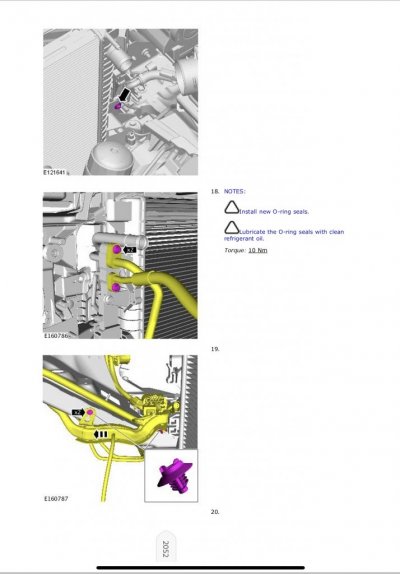
Finally got around to starting this today. I've got all the Belts/Hoses off, and wanting to pull the radiator to clean it as there's a lot of WASP Dirt nest stuck to it that I just saw. I've got all the hoses off, both bolts out, and something it holding it to the AC Condenser Assembly. Anyone pulled this before?
You are using an out of date browser. It may not display this or other websites correctly.
You should upgrade or use an alternative browser.
You should upgrade or use an alternative browser.
2015: Coolant Pipes; WP; Tstat; Hoses Replacement (and Radiator R&R)
- Thread starter timc930
- Start date
Disclaimer: Links on this page pointing to Amazon, eBay and other sites may include affiliate code. If you click them and make a purchase, we may earn a small commission.
jlglr4
Full Access Member
I haven’t pulled it, but looking quickly at the manual, it does appear that the ac lines run through a piece of the radiator assembly and need to be disconnected. The procedure for removing the radiator also refers to the ac evacution and charging procedure, suggesting that the ac lines need to be disconnected. You might consider another way to clean some of that junk out rather than discharging and recharging the ac system.
Attachments
Thank you. Yeah I saw the same thing. after looking thru the manual tonight. I’ll prob just evacuate and charge the AC. I need to clean it all up and I’d rather just deal with it now while I am replacing all the coolant hoses. It must of sat a lot before bought it, as there’s 4-5 nest attached to the radiator as well as a ton of leaves and gunk in there.
After talking to a friend, and at his recommendation, after removing all radiator hoses, and the two large bolts that secure it to the Frame, and the two small sheet metal screws that attach it to a cowl, I was able to lift the complete assembly up and move it to a position that allowed me to easily remove the sheet metal screws from the front that hold the condenser assy to the radiator to free it up and remove. I think there were 6 at the front that I had to remove. Radiator requires some moving around and tilting pass side up and it will come out at an angle. There is also a Christmas tree vacuum line support about 3/4 way down on pass side that I had to pull out as the radiator side was hitting it. Very tight coming out but it will come if you are patient and watch all the lower corners.
Last edited:
Got everything off today, but instead of starting a new thread with my “lessons learned” I am going to add to this one:
 www.landroverworld.org
2016 LR4 Coolant Crossover, Water Pump, Thermostat Replacement
Thought I’d share (yet another) report on the coolant crossover issue. I have a 2016 Landmark Edition (service date was April 2016 I believe) with just over 50K miles. Took it to the dealer three times (two different dealers) prior to warranty expiration for coolant odor, but no leaks were...
Similar threads
- Replies
- 15
- Views
- 7K
- Replies
- 12
- Views
- 7K


